My Looks

Venom Wearin’ Denim

Suggested song for enjoying this post: “Venom Wearin’ Denim” by Junior Brown. Complimented splendidly by this quirky YouTube music video/collage:

You know those perfect denim shorts you’ve been looking for the last three summers in a row? Those fabled shorts where every time you think you’ve found them it turns out that they’re either just a little too long, too short, too bleached, too shredded, etc.? Yeah, those perfect jean shorts? They don’t exist….yet.

This summer, sick of long dressing-room debates and constant sizing confusion, I decided to take matters into my own hands and make my own denim shorts. TAKE THAT WORLD!

image-1

The ingredients are simple:

  1. A good pair of “mom jeans” (compliments of Goodwill, Salvation Army, or a box of your mom’s 90’s clothes)
  2. A scalpel/exacto knife (found at any craft store)
  3. Newspaper
  4. Crafting studs (I found the ones I used at Michael’s)
  5. Scissors

photo

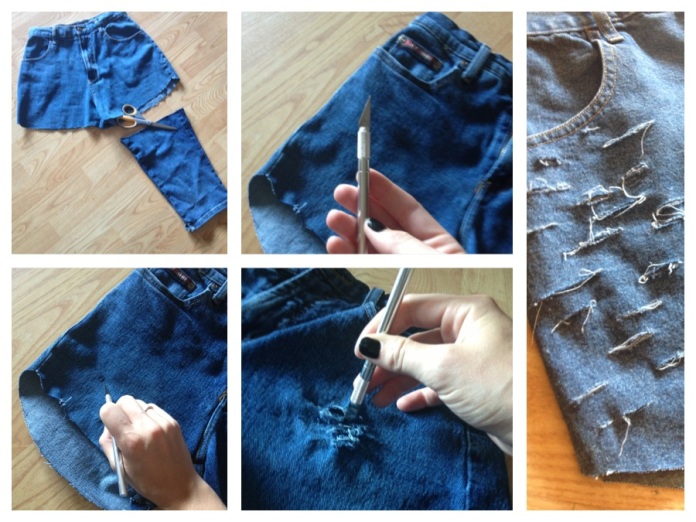
STEP ONE: The jeans are obviously the most important part. Choosing from secondhand jeans means that your options may not seem to fit your style, but no need to worry–you’ll be cutting them up anyways. Once back at home, turn the jeans inside out and put them on. Standing in front of a mirror, use a pen to mark your ideal length. If you’re not sure how short you want to go remember that starting longer is always better, you can always cut them shorter later! (Tip: I cut my jeans to be a little shorter in the front than in the back. Another option is making them shorter on the sides and longer in the front and back).

STEP TWO: After cutting your shorts to your desired length, turn them right-side out and get out your newspaper. Insert the newspaper in between the shorts, making sure that your pockets are behind the newspaper. You will be shredding the shorts with the scalpel/exacto and you don’t want the knife to cut through to the other side or into the pockets. Decide where you’d like to shred the shorts (one side, both sides, totally shredded, only some shredding), then take the knife and dig it into the desired area, cutting a strip. Use the knife to continue to stress the area and continue as you see fit (see picture above).

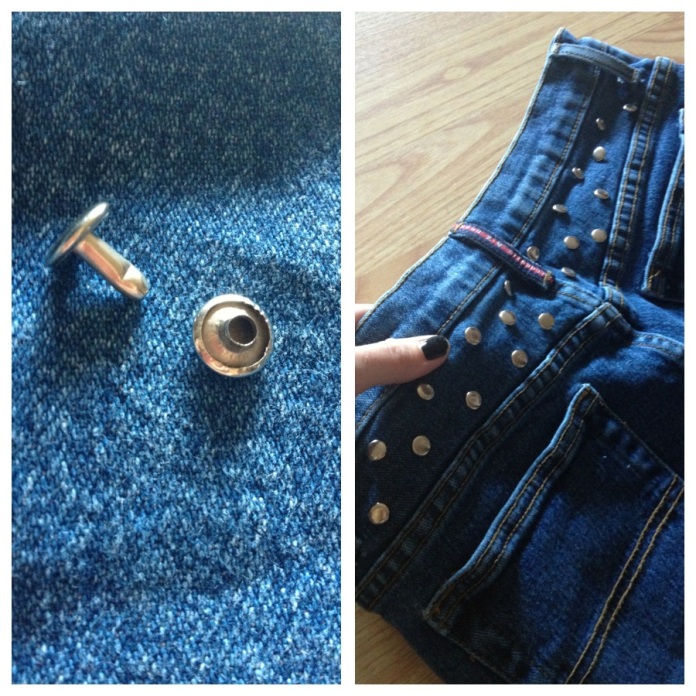
STEP THREE: Use studs to create your desired pattern. 

image

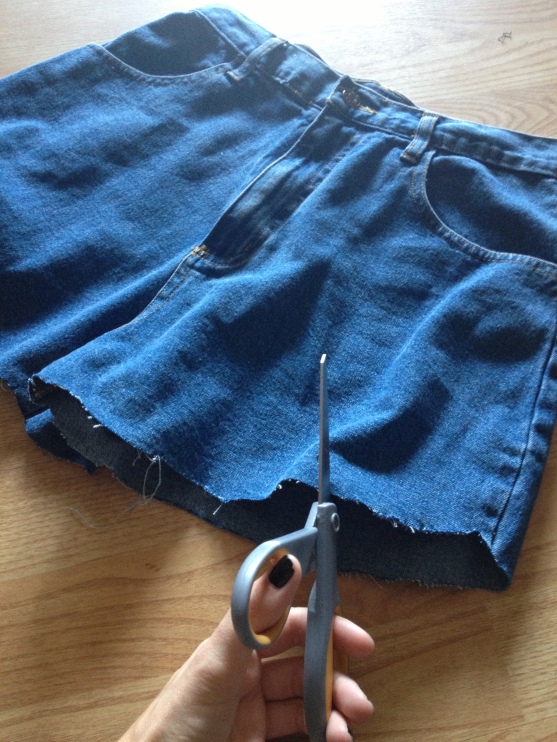
STEP FOUR: Use scissors to stress the ends of the shorts. Put the edge of the shorts at the divide of the scissors and work them back and forth to fray the denim.

photo-2


Voila! Enjoy your custom jean shorts for August!

Psst! PS! Need more LDC? Follow me on Twitter @LexDoesCollege

Standard
Venturing Beyond PB & J's

Venturing Beyond PB & J’s: Mini Pizzas

While shopping at the grocery store this past week with my boyfriend, I had an epiphany. We had just been discussing how fun it would be to have a ‘make-your-own pizza night’ but were discouraged by the idea of spending extra money on the pre-made crust and having to put the crappy oven in his apartment to the test–not to mention factoring in calorie count for  a big pizza. It was ten minutes later as I was walking down the bread aisle that I realized make-your-own pizzas were still within our reach. The key? English muffins.

So, without further ado, I present to you hungry LDC readers theeeeee……..Mini Pizza! It’s a trashy college version of a make-your-own pizza and most importantly, it’s delicious.

Screen shot 2013-07-18 at 7.05.35 PM

To me, the #1 benefit of the Mini Pizza is calorie control. The English muffins we bought at the store were just 130 calories per whole muffin (and only $1.60 too!) which is enough for two itty bitty pizzas. We topped ours with a pre-made pizza sauce from a jar but spaghetti sauce or even tomato paste would work just as well.

Next step, some toppings. We were too cheap to buy anything fancy at the store but were able to find some minced garlic and chopped onion from scouring the apartment (I would advise against buying anything for the pizza; the whole goal is to keep things economical and it’s a great chance to use up some leftover ingredients). We followed this with a layer of mozzarella cheese and it was time to put our creations in the oven! (Note: I would highly recommend toasting the English muffin once before adding toppings, it helps keep the “crust” from getting soggy).

The #2 benefit of the Mini Pizza is convenience–no oven necessary. You can cook your personal pizza to perfection with just a few minutes in a toaster oven or microwave and voila! It’s ready to enjoy.

Looking to spice up your Mini Pizza? Here are some other “leftovers” topping ideas!

  • Buffalo sauce pizza: Combine ranch and hot sauce into a bowl, mix well. Shred leftover chicken into little pieces and mix it in with the hot sauce and ranch. Add to pizza, top with cheese and enjoy! No chicken? The sauce is still tasty without it!
  • Classy pizza: A few leaves of spinach, several chopped up cherry tomatoes, and mozzarella cheese. A mini Caprese salad, mmm!
  • Hamburger barbacoa pizza: Sprinkle your pizza with ground beef and a light layer of barbecue sauce.
  • Mexican pizza: Switch out your traditional pizza sauce for salsa and top with Mexican cheese, ground beef and peppers. Dip with hot sauce for an extra kick.


Standard
My Looks

Summer Manicure? Nailed It

So despite pinning about 15 different DIY manicure designs over the last two years, I’ve never actually attempted any of them. Why you ask? BECAUSE THEY ALL LOOK HARD, THAT’S WHY. Being afraid of failure (and of wasting nail polish) is a big character flaw of mine, thus I knew it was time to find some middle ground.

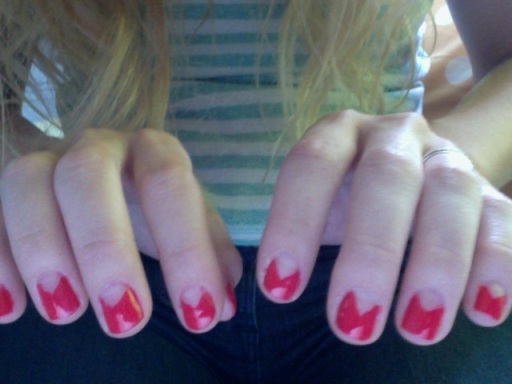
The back story: during my last week in Spain, we decided to have a Girl’s Night and paint nails, drink wine, and watch No Strings Attached. My artsy friend had this fancy technique for painting her nails that looked like a pain in the butt but really wasn’t. The design turned out super cute, reminiscent of a chevron pattern but in a manicure.

Here’s my attempt:

Photo on 2013-05-12 at 16.35 #3And here’s how I did it:

  1. Select your chosen nail polish color (Note: you can also do this pattern with a second color under the chevron, which would mean putting the first color on as a base coat and painting the chevron design on top).
  2. Locate some tape
  3. Tear off a small piece of tape and stick one of the corners to your cuticle, right where the moon of you nail is.
  4. Paint your nail as if the tape weren’t there using your chosen color.
  5. Let dry (Note: I would let it dry for a little longer than normal because taking the tape off can get messy if you don’t wait enough).
  6. Carefully remove tape.
  7. Apply clear coat over the whole nail.

Voila!

If your friends ask, say you got it done professionally…hehehe.

Standard
My Looks

GO NEON OR GO HOME

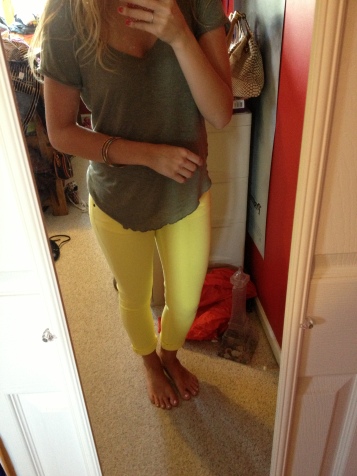
317285_10151883608143916_1530210765_nSummer is here and it’s time to bring the heat with hot neon colors. Denim, crop tops, and accessories, you name it. I first came across this trend last spring at J.Crew after happening upon an entire rack of assorted neon skinny jeans during an under-funded shopping spree. I was immediately in love. Flash forward to a year later and neon only seems to be gaining steam. Despite what you may think, the neon trend is not a hard one to follow, as long as you abide by a few simple rules.

First off, you have to grow up. Let’s put the day-glo frat tanks and flat-brim hats to rest. This is not PCB everybody. Neon should be an accent or a subtle statement, not a show-stopper. You have to pick colors that, while bright, are not going to blind everyone you come into contact with. Important point: NO NEON MINISKIRTS. Pick one: either the miniskirt or the neon. Not both. This is not a contest to see how many landscapers you can get to cat call at you in one afternoon.

Another crucial point? Wear sizes that fit you right. If you cram yourself into a pair of neon skinny jeans that are a size or two too small, it won’t be pretty. Neon jeans have the curious ability to make everything look more *defined*. In fact, a male friend told me that his favorite thing for girls to wear are “colored tight jeans” (umm yeah he meant neon skinnies, had to clarify that) because it made their legs look great. BAM. Sounds a lot classier than wearing disturbingly sheer black leggings, but maybe that’s just me.

photoMy favorite part about neon might be the insta-tan factor. I’ve come to acknowledge that I’ll never be one to achieve the sun-kissed glow without the help of many, many chemicals so neon is a helpful alternative. Putting on my neon skinny jeans or crop top makes me look like I’m half Brazilian.

Also important is dressing around your neons. You have to let the neon do the talking and the rest of the outfit settle in around it. Although bold matching looks great, there is a fine line between chic and over-kill. Stay away from floral patterns (also big this year) or aggressive stripes (again, also big). Additionally, it is crucial to keep in mind that you do not have to match to your neon. That’s right, YOU. DO. NOT. HAVE. TO. MATCH. IT. As long as you pick complimentary colors, there is no need to go out searching for accessories or shirts to go with your hot pink pants.

Note: I think neons look great with a nice, neutral pinkish nail color.

Happy Memorial Day Weekend and a great summer ya’ll! May your tans be even and your frozen margaritas tasty

Standard

Healthy Eating Starts Today!

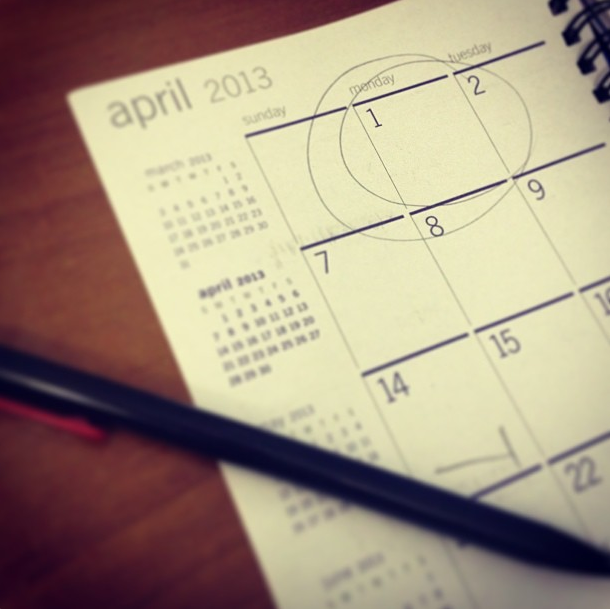
It’s April 1st and it’s high time for healthy eating to recommence. Beach season is right around the corner and there’s a summer of short-shorts and tight dresses ahead.

Idk about you, but I’m starting my spring regimen with a long run, a big yellow apple, and a new pair of running shorts 🙂

—Need a push? Check out LDC’s “Post Holiday Cleanse” in the ‘All Posts’ tab—

Lifestyle

Healthy Eating Starts Today!

Image
Lifestyle

It’s Spring Cleaning Time!

How great is it to feel the sun on your skin again? I can’t get enough of spring! This year, I’m going all out with spring by doing a full-scale spring cleaning of my life. That means closet, diet, and old habits are all in need of a thorough re-evaluation.

Springtime in Dublin!

Springtime in Dublin!

After visiting Ireland a few weeks past and getting a taste of spring in the UK, I felt completely re-energized and ready for April! With only one month left abroad and a trip to Portugal coming up in three weeks, it’s high time for me to leave the olive oil and fresh bread behind and start truly getting ready for beach season. Every year, we all make valiant (however last minute or half-hearted) efforts to get ready for spring break, and this is the chance to follow through with whatever lifestyle changes you promised you’d make and carry them through til summer!

I went on a long, outdoor run for the first time since December’s snow and it felt amazing. I highly recommend mixing up your usual work out routine to try something new and pump your enthusiasm back up. I might even try one of the three hundred exercise routines I’ve pinned… Spring is also the perfect time to take a good look at your eating habits: are you drinking enough water? Getting all your fiber? Eating lots of fruits and veggies? If not, time to make some changes. For further tips, check out this post 🙂

Your closet shouldn’t be allowed to escape a spring cleaning either–those three shirts you never bring to school with you but never wear back at home either? Donate them! Old sandals that are falling apart or rub your feet the wrong way (no matter how many times you tell yourself that they’re almost worn in)? Donate them! Grungy bathing suits from years ago that you keep at the bottom of your drawer? Throw them the eff out. Spring is the perfect excuse to get organized, so don’t let it pass you by.

Over the next few weeks, look around your life for clothes/knick-knacks/people/problems that are weighing you down and evaluate how best to address them.

The lush and green Cliffs of Moher (bright pastel purple skinny jeans were a must of course)

The lush and green Cliffs of Moher (bright pastel purple skinny jeans were a must of course)

Standard